一、目标

持续集成是一个不断迭代优化演进的过程,持续集成iOS打包,当前任务需要完成:

  • 内部测试版本:使用标准开发者的Developer证书签名的ipa文件。
  • 公开测试版本:使用企业账户的Distribute InHouse证书签名的ipa文件。
  • AppStore版本:使用标准开发者的AppStore证书签名的ipa文件。
  • 将打包结果推送公司Slack群
  • 让测试和开发解耦开,测试随时自由打包

    二、初识

    一开始使用的是xcodebuild写的shell打包脚本,初次认识fastlane 的时候是去年的 10 月份,是老大开会提到了这样的以打包工具。仔细调研了一下,非常精细。它一个针对于 iOS 和 Android(后来才支持的)全方位自动化流程的工具套件。
  • deliver: Upload screenshots, metadata, and your app to the App Store
  • supply: Upload your Android app and its metadata to Google Play
  • snapshot: Automate taking localized screenshots of your iOS and tvOS apps on every device
  • screengrab: Automate taking localized screenshots of your Android app on every device
  • frameit: Quickly put your screenshots into the right device frames
  • pem: Automatically generate and renew your push notification profiles
  • sigh: Because you would rather spend your time building stuff than fighting provisioning
  • produce: Create new iOS apps on iTunes Connect and Dev Portal using the command line
  • cert: Automatically create and maintain iOS code signing certificates
  • spaceship: Ruby library to access the Apple Dev Center and iTunes Connect
  • pilot: The best way to manage your TestFlight testers and builds from your terminal
  • boarding: The easiest way to invite your TestFlight beta testers
  • gym: Building your iOS apps has never been easier
  • match: Easily sync your certificates and profiles across your team using Git
  • scan: The easiest way to run tests for your iOS and Mac apps
    它可以集成打包,甚至上传AppStore和TestFlight,简直神器。

    三、使用Fastlane打包

    下载fastlane,就三个命令:
1
2
3
sudo gem update --system
sudo gem install bundler
sudo gem install fastlane

可以查看一下 fastlane -v的版本,我们打包主要用到gym和上传命令pilot,其他工具略有研究,但是未深入,还要提醒,我都是用的命令行格式,未使用官方推荐的Fastfile的方式,主要是我对ruby不够了解,因为我也是个大菜鸟。附上打包命令。

gym打包,需要讲解的不多,DEVELOPMENT_TEAM等等解释,可以详细看这里https://dpogue.ca/articles/cordova-xcode8.html
需要提醒的是 xcpretty_report_josn可以输出oclint需要的xcpretty执行之后的内容,这里可以oclint集成到一起

1
2
3
4
5
6
7
8
9
10
11
12
13
14
15
16
17
18
19
20
21
22
23
24
25
26
27
28
29
30
31
32
33
34
35
36
37
38
39
40
41
42
43
44
45
46
47
48
49
50
51
52
53
54
55
56
57
58
59
60
61
62
63
64
65
66
67
68
69
70
71
72
73
74
75
76
77
78
79
80
81
82
83
84
85
86
87
88
89
90
91
92
93
94
95
96
97
98
99
100
101
102
103
104
105
106
107
108
109
110
111
112
113
114
115
116
117
118
119
120
121
122
123
124
125
126
127
128
129
130
131
132
#!/bin/bash
#计时
SECONDS=0
#假设脚本放置在与项目相同的路径下
project_path=$(pwd)
#取当前时间字符串添加到文件结尾
now=$(date +"%Y_%m_%d_%H_%M")
#取替换BundleVersion的时间字符串
now_date=$(date +"%Y%m%d%H%M")
#获取当前脚本路径
file_path=$(cd `dirname $0`; pwd)
#指定项目的scheme名称
scheme="MiFit"
#指定要打包的配置名
configuration="Release"
#指定打包所使用的输出方式,目前支持app-store, package, ad-hoc,
enterprise, development, 和developer-id,即xcodebuild的method
参数
export_method="app-store"
#指定项目地址
workspace_path="xx"
#指定输出路径
output_path="$project_path/APP/${now}_out"
#指定输出归档文件地址
archive_path="xx"
#指定输出ipa地址
ipa_path="$output_path/"
#指定输出ipa名称
ipa_name="xx"
#指定image和ipa最后路径
image_path="$project_path/APP/image_out/"
#工程内infoplist
project_infoplist_path="${project_path}/xx/Info.plist
#bundleIdentifier
bundle_id="xx"
#证书名称
rightDistributionSign="xx"
#手动证书管理方式
sed -i '' 's/ProvisioningStyle = Automatic;/
ProvisioningStyle = Manual;/g' "$project_path/
MiFit.xcodeproj/project.pbxproj"
#development_team名称
DEVELOPMENT_TEAM="xx"
#PROVISIONING_PROFILE_SPECIFIER名称
PROVISIONING_PROFILE_SPECIFIER="xx"
#ExoptionPlist地址
ExoptionPlist="${file_path}/Mifit-appstore.plist"
#修改info_plist中BundleVersion
bundleBuildVersion=$(/usr/libexec/PlistBuddy -c "print
CFBundleVersion" "${project_infoplist_path}")
if [ "${bundleBuildVersion}" != "${now_date}" ]; then
/usr/libexec/PlistBuddy -c "set CFBundleVersion
${now_date}" ${project_infoplist_path}
fi;
#修改info_plist中BundleShortVersion,由于上传appstore对此有严格要求,故在不传入bundleShortVersion时,自动修正
bundleShortVersion=$(/usr/libexec/PlistBuddy -c "print
CFBundleShortVersionString" ${project_infoplist_path})
build_version=$1
if [ $1 != "" ]; then
/usr/libexec/PlistBuddy -c "set CFBundleShortVersionString
${build_version}" ${project_infoplist_path}
else
arr=(${bundleShortVersion//./ })
if [ "${#arr[@]}" -gt 3 ] ; then
bundleShortVersion=${arr[0]}"."${arr[1]}"."$(($
{arr[2]}+1))
elif [ "${#arr[@]}" -eq 3 ] ; then
bundleShortVersion=${bundleShortVersion}
else
bundleShortVersion=${bundleShortVersion}".1"
fi;
/usr/libexec/PlistBuddy -c "set CFBundleShortVersionString
${bundleShortVersion}" ${project_infoplist_path}
fi;
#修改info_plist中bundleid
bundleIdentifier=$(/usr/libexec/PlistBuddy -c "print CFBundleIdentifier" ${project_infoplist_path})
if [ "${bundleIdentifier}" != "\$(PRODUCT_BUNDLE_IDENTIFIER)" ]; then
if [ "${bundleIdentifier}" != "${bundle_id}" ]; then
/usr/libexec/PlistBuddy -c "set CFBundleIdentifier
${bundle_id}" ${project_infoplist_path}
fi;
fi;
#获取执行命令时的commit message
commit_msg="$1"
#输出设定的变量值
echo "===workspace path: ${workspace_path}==="
echo "===archive path: ${archive_path}==="
echo "===build version: ${build_version}==="
echo "===ipa path: ${ipa_path}==="
echo "===ipa name: ${ipa_name}==="
echo "===export method: ${export_method}==="
echo "===commit msg: $1==="
#先清空前一次build
rm -rf ~/Library/Developer/Xcode/DerivedData/*
PROVISIONING_PROFILE_SPECIFIER="{PROVISIONING_PROFILE_SPECIF
IER}"
fastlane gym
--workspace ${workspace_path}
--scheme ${scheme}
--clean true
--configuration ${configuration}
--xcargs
"PRODUCT_BUNDLE_IDENTIFIER='${bundle_id}'
DEVELOPMENT_TEAM='${DEVELOPMENT_TEAM}'"
--export_method ${export_method}
--archive_path ${archive_path}
--codesigning_identity "${rightDistributionSign}"
--export_options ${ExoptionPlist}
--output_directory ${ipa_path}
--output_name ${ipa_name} || exit
#复制ipa到指定最后路径
if [ ! -d "${image_path}" ]; then
mkdir -p ${image_path}
fi
rm -rf "${image_path}MiFit.ipa"
rm -rf "${image_path}MiFit.app.dSYM.zip"
\cp -fr "${ipa_path}${ipa_name}" "${image_path}"
\cp -fr "${ipa_path}MiFit.app.dSYM.zip" "${image_path}"
#输出总用时
echo "===Finished. Total time: ${SECONDS}s==="

四、集成推送Slack

讲讲其他遇到的坑和解决方案。
由于主要使用fastlane中gym打包,但是这次需要注意的我们的需求是:

  • 需要分别打inhouse,adhoc,appstore的包
  • inhouse和adhoc作为内测,需要更换显示图标,加上内测字样。
  • inhouse包需要上传蒲公英(之前选择的Fir因为部分收费要求放弃了),需要跟slack对接,并且自动推送。

1、分别打三种包,对证书和rightProvision了解的不够透彻?

解决:把三种证书都从开发那里要过来,然后将自己的APPLE ID升级到开发者Admin状态,就具有了三种证书的使用权限,然后跟开发一一对接,对每个包分别对应的证书了解并整理,打包的时候一一对应上就好。这个过程中,收获的是对xcodebuild的method参数有更深的了解,其实inhouse,adhoce,appstore分别对应的打包方式是enterprisead-hocapp-store

2、需要更换inhouse的图标?

解决:之前想通过是打包的时候指向不同的target,后来的解决方案是直接替换。

1
2
3
4
5
6
for file in os.listdir(appIconPath):
if ".png" in file:
for appicon in os.listdir(replaceAppIconPath):
if file == appicon:
shutil.copy(replaceAppIconPath+'/'+appicon,
appIconPath+'/'+file)

但是需要注意的是像素和尺寸需要保持一致,设计同学的帮忙很必要。

3、和slack对接

解决:其实我觉得slack真的非常好用,因为它提供了各种整合持续集成的api,这里特别佩服我们老大对这块内容的重视,slack和jenkins集成非常方便。
只是网速有点不靠谱。slack api地址:https://api.slack.com/docs/message-guidelines
附上我写的脚本,借助slack web api推送信息到slack,并且可以取出jenkins中执行者的信息:

1
2
3
4
5
6
7
8
9
10
11
12
13
14
15
16
17
18
19
20
21
22
23
24
25
26
27
28
29
30
31
32
33
34
35
36
37
38
39
40
41
42
43
44
45
46
47
48
49
50
51
52
53
54
55
56
57
58
59
60
61
62
63
64
65
66
67
68
69
70
71
72
73
74
75
76
77
78
79
80
81
82
83
84
85
86
87
88
89
90
91
92
93
94
95
96
97
98
99
100
101
102
103
104
105
106
107
108
109
110
111
112
113
114
115
116
117
#coding=utf-8
import sys
import time
import requests
import re
from slacker import Slacker
def send(job_url, job_name, starters, build_timestamp,
workspace, build_cause, git_branch, change_log, text,
userid):
"""执行结果推送slack,可选个人和channel"""
api_token = "xxxx"
slack = Slacker(api_token, 100)
data = [{
"fallback": "Required plain-text summary of the
attachment.",
"color": "#36a64f",
"fields": [
{
"title": "Job name",
"value": job_name,
"short": True
},
{
"title": "Build Trigger",
"value": starters,
"short": True
},
{
"title": "Build Time",
"value": build_timestamp,
"short": True
},
{
"title": "Build Workspace",
"value": workspace,
"short": True
},
{
"title": "Root Build Cause",
"value": build_cause,
"short": True
},
{
"title": "GIT_BRANCH",
"value": git_branch,
"short": True
},
{
"title": "Job url",
"value": job_url,
},
{
"title": "CHANGE_LOG",
"value": change_log,
}
],
"footer": "XX公司",
"ts": time.time()
}
]
try_times = 0
while try_times < 5:
try:
slack.chat.post_message(userid, text=text,
attachments=data)
return "push to slack failed"
except Exception as e:
time.sleep(50)
try_times += 1
if try_times >= 5:
raise Exception('push to slack failed')
def get_content(job_url):
"""取出console log全部内容"""
url = job_url + "consoleText/api/json"
headers = {
"Content-Type": "application/json",
"Accept": "application/json"
}
response = requests.get(url, auth=("xx", "xx"))
assert response.status_code == requests.codes.ok
return response.content
def get_trigger(result):
"""取出构建者"""
trigger_user = re.findall(r"Started by", result)
trigger_other = re.findall(r"Triggered by", result)
starters = ""
if len(trigger_user) > 0:
starters = re.findall(r"Started by(.*)", result)
[0].lstrip()
elif len(trigger_other) > 0:
starters = re.findall(r"Triggered by(.*)", result)
ers = re[0].lstrip()
return starters
if __name__ == '__main__':
if len(sys.argv) >= 2:
job_url = sys.argv[1]
job_name = sys.argv[2]
build_timestamp = sys.argv[3]
workspace = sys.argv[4]
build_cause = sys.argv[5]
git_branch = sys.argv[6]
text = sys.argv[7]
userid = sys.argv[8]
change_log = sys.argv[9]
result = get_content(job_url)
starters = get_trigger(result)
result = get_content(job_url)
starters = get_trigger(result)
send_userid = ["#xx", userid]
for i in send_userid:
send(job_url, job_name, starters, end(job_url,build_timestamp, workspace, build_cause, git_branch,
change_log, text, i)

然后构造请求,发送即可,详细不表。

4、因为我们app两个平台用的xcode版本不一致,需要升级到xcode8,需要将自动管理改为手动管理证书。
1
2
sed -i '' 's/ProvisioningStyle = Automatic;/ProvisioningStyle = Manual;/g'
"$project_path/project.pbxproj"
5、pod install总是出现问题,分析可能是因为网络或者本机pod安装有问题。

若是pod问题,可以通过升级gem解决。

1
2
sudo gem update --system
sudo gem install -n /usr/local/bin cocoapods

小贴士:谨慎使用sudo gem update

6、结果展示

这是我们已经落地的工程,送上Slack推送截图。
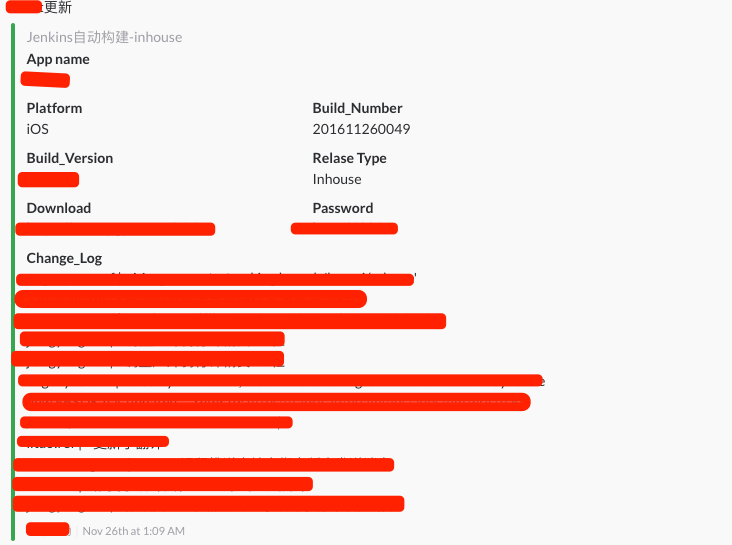
Slack截图

五、集成推送TestFlight

Testflight当前已经被苹果公司收购并完善了功能,可以分发内测,作为提升app质量有很好的推动作用。推送TestFlight主要借助fastlane pilot
看到pilot是最好的方式管理你的TestFlight 测试人员和从终端构建的工具。

小贴士:上传TestFlight的ipa必须打包方式是appstore,且版本号应该为3位并高于已经在线上Appstore可以下载的版本。

1、上传脚本
1
2
3
4
5
6
7
8
9
10
11
12
13
14
15
16
17
18
19
20
21
22
23
24
25
26
27
28
29
30
31
32
33
34
35
36
37
38
39
40
41
42
43
44
45
46
47
48
49
50
#!/bin/bash
set -x
#计时
SECONDS=0
#假设脚本放置在与项目相同的路径下
project_path=$(pwd)
#取当前时间字符串添加到文件结尾
now=$(date +"%Y_%m_%d_%H_%M")
#取替换BundleVersion的时间字符串
now_date=$(date +"%Y%m%d%H%M")
#获取当前脚本路径
file_path=$(cd `dirname $0`; pwd)
#上传用户的username
username="xx"
#上传用户App id
apple_id="xx"
#bundleIdentifier
bundle_id="xxx"
#指定image和ipa最后路径
ipa_path="$project_path/xx.ipa"
#上传team_id
team_id="xxxx"
#上传team_name
team_name="xxx"
#上传dev_portal_team_id
dev_portal_team_id="xxx"
#上传itc_provider
itc_provider="xxx"
distribute_external=$1
changelog="xxxx"
beta_app_description="xxxx"
#反馈邮箱
email="xxxx"
group=$2
if [ -z "$2" ]; then
group="xxx"
fi
#执行上传testflight
pilot upload --verbose --username ${username} --app_identifier ${bundle_id}
--changelog ${changelog} -d ${beta_app_description}
--ipa ${ipa_path} --distribute_external ${distribute_external}
--apple_id ${apple_id} --team_id ${team_id}
--team_name "${team_name}" --dev_portal_team_id ${dev_portal_team_id}
--itc_provider "${itc_provider}" --beta_app_feedback_email "${email}" | exit
#输出总用时
echo "===Finished. Total time: ${SECONDS}s==="

脚本中的例如team_id等这些值,对于开发或者测试来说应该都不陌生,虽然脚本简单,但是能方便的上传TestFlight,并且分发外部测试,真的非常方便。

2、结果展示

最后集成到jenkins,可以看到结果:
推送TestFlight
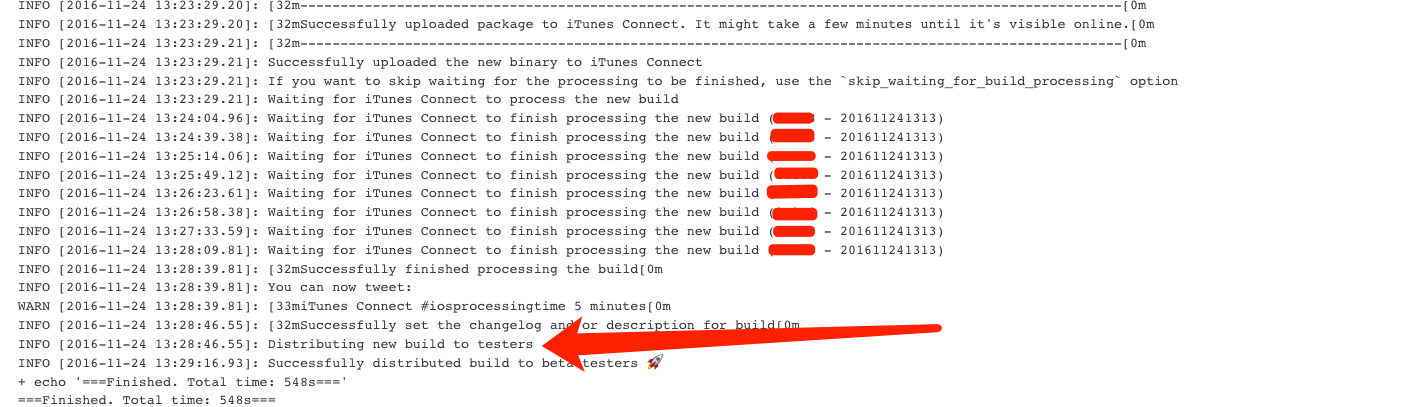
看到箭头指示的出现,代表已经成功的分发测试,可以去Testflight app下载安装新版本了。

六、总结

持续集成工作的开展不是一蹴而就的,iOS打包集成涉及到各种证书环节,需要仔细理清。

七、相关文档